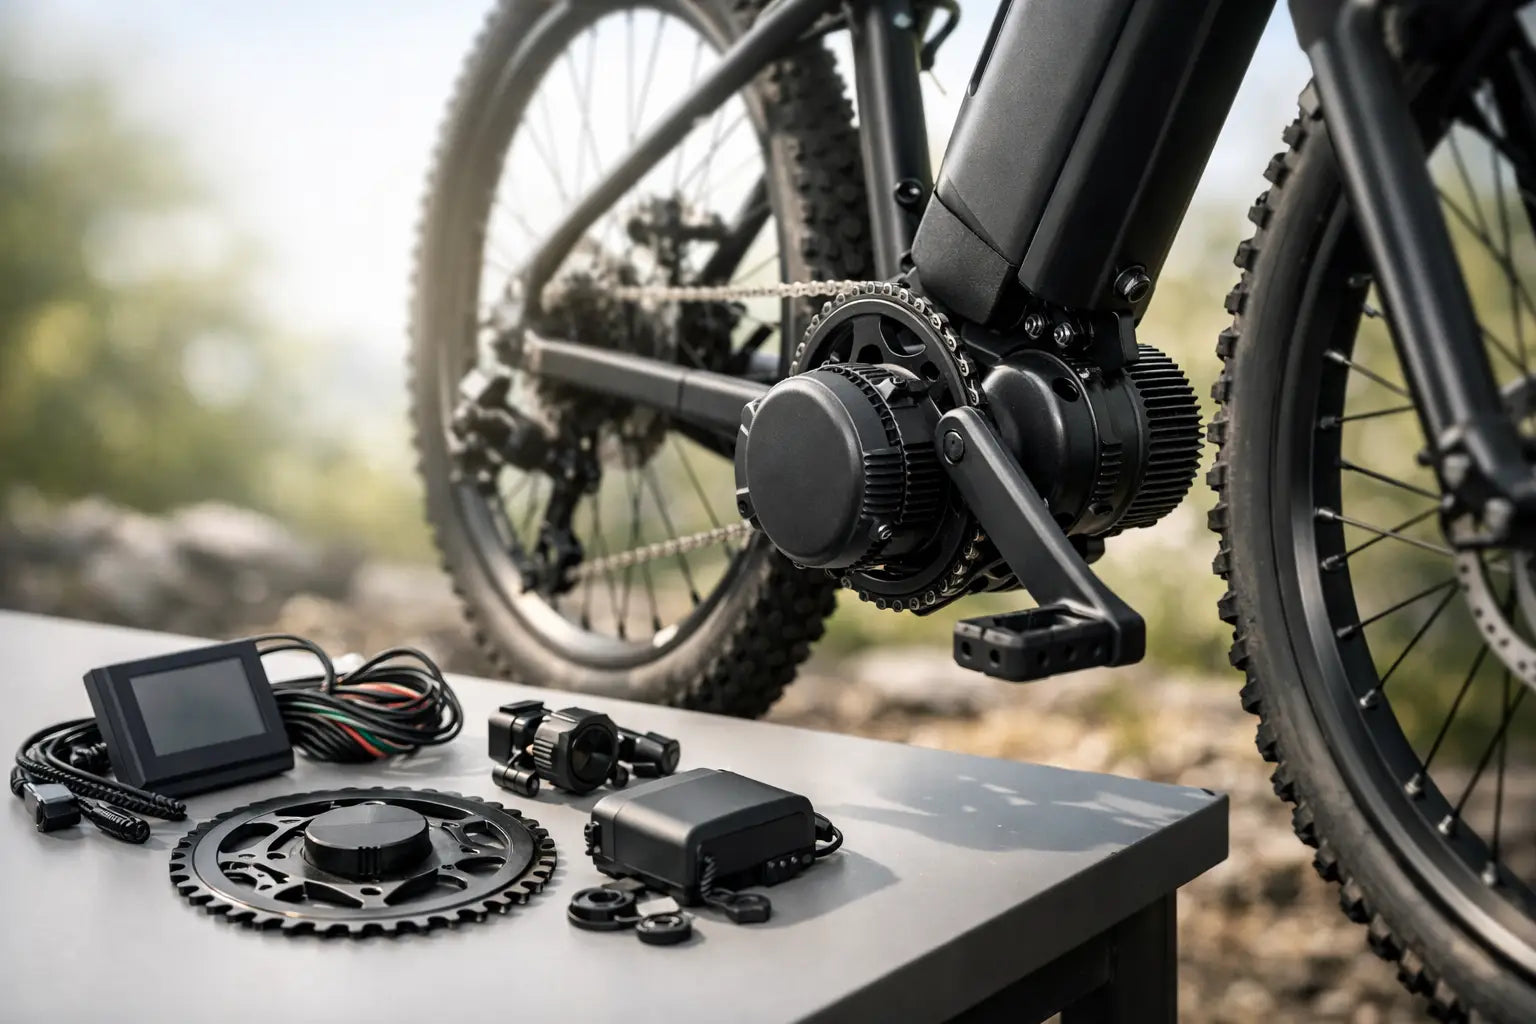
A good e bike conversion kit mid drive motor can turn the bike you already trust into a capable commuter, hill climber or long-distance leisure machine. A poor match can mean noisy riding, worn drivetrain parts and a bike that never feels quite right. The difference comes down to more than motor wattage. Frame fit, gearing, battery placement and proper set-up all matter.
For riders who want natural-feeling assistance and useful climbing power, a mid-drive conversion is often the strongest option. It puts the motor at the bike’s bottom bracket - the point where your pedals and chainset already do their work - rather than adding weight to a wheel.
Why choose an e bike conversion kit mid drive motor?
A mid-drive motor drives the chain, so it can use the bike’s existing gears. Select an easier gear on a steep climb and the motor can spin efficiently rather than labouring at low speed. That makes a real difference on hilly commutes, loaded rides and stop-start journeys.
The motor’s weight also sits low and centrally in the frame. Compared with a hub motor, that generally gives the bike a more balanced feel when cornering, lifting it into a cycle stand or riding on uneven roads. It still feels like your bike, only with purposeful assistance when you press the pedals.
Mid-drives are not automatically right for every rider. They place more load through the chain, cassette and chainring than a hub system. If your drivetrain is already worn, fitting a powerful motor without replacing tired parts is false economy. A workshop inspection before conversion can prevent poor shifting, chain skipping and premature component wear.
Start with the bike, not the motor
The best conversion begins with an honest look at the donor bike. A well-maintained hardtail mountain bike, hybrid or trekking bike is often an excellent candidate. These bikes typically have sensible tyre clearance, dependable brakes and gearing that suits mixed roads and gradients.
First, check the bottom bracket. Many common mid-drive kits are designed for standard threaded bottom-bracket shells, but shell width, diameter and cable routing all need checking. Press-fit bottom brackets, unusual frame shapes, full-suspension linkages and very wide bottom brackets can complicate the installation. Do not order a kit based on a photo and hope for the best.
Frame material matters too. Steel and aluminium frames are common conversion choices, provided the frame is sound and there is room for the battery. Carbon frames require extra caution. Clamping a battery cradle to delicate tubing or forcing an incompatible motor into the bottom bracket can damage an expensive frame.
Braking deserves the same attention as the power system. More speed and more frequent riding demand reliable stopping. Disc brakes in good condition are ideal, but quality rim brakes that are correctly set up can also be suitable for a legal, sensibly powered conversion. Worn pads, tired cables, warped rotors and loose headset bearings should be dealt with before the first assisted ride.
Motor power: more is not always better
It is tempting to focus on the biggest wattage figure, but power only tells part of the story. Torque, controller behaviour, sensor type, rider weight, terrain and gearing determine how a bike feels on the road.
For UK public-road use, an electrically assisted pedal cycle must meet EAPC requirements. In broad terms, the motor must have a maximum continuous rated power of 250 watts, assistance must cut out at 15.5 mph, and the motor must provide assistance only while the rider is pedalling, apart from limited walk-assist functions. A conversion that exceeds those limits may require registration, insurance, a licence and other legal obligations to be used on public roads.
That does not mean a road-legal 250W mid-drive is weak. With the right gearing, it can make everyday hills manageable and keep a commuter moving into a headwind. Higher-power systems suit private-land use or specific regulated applications, but they should not be sold to a rider as a simple plug-and-play road bike upgrade.
Torque-sensing and cadence-sensing systems create different riding experiences. A cadence sensor adds power once it detects pedalling, often delivering a strong, straightforward boost. A torque sensor responds to how hard you pedal, producing assistance that can feel smoother and more intuitive. Neither is universally better. Riders seeking relaxed commuting may like predictable cadence-based help, while cyclists who want the bike to respond closely to their effort often prefer torque sensing.
Battery choice sets your real-world range
The battery is usually the most expensive part of the conversion after the motor, and it deserves careful selection. Voltage must match the motor system. Capacity is usually expressed in watt-hours, calculated by multiplying volts by amp-hours. A 36V 14Ah battery, for example, stores about 504Wh.
Range cannot be promised from a single figure. A light rider on flatter roads using lower assistance may cover substantially more distance than a rider carrying luggage up repeated climbs in a high mode. Wind, tyre pressure, temperature, battery age and how often you start from rest all affect consumption.
For many everyday riders, a battery in the 400Wh to 600Wh range offers a practical balance of range, cost and weight. If you regularly cover longer distances, carry children or cargo, or have limited charging opportunities, extra capacity can be worthwhile. Just remember that a larger battery adds weight and needs a secure mounting position.
A downtube-mounted battery is usually the neatest solution because it keeps mass central and low. It needs enough clear, straight tube space and should not interfere with bottle cages, cables or suspension movement. Rear-rack batteries can solve a frame-space problem, but they move weight higher and further back. Whatever the location, the battery must be firmly fixed, protected from impacts and removed or secured appropriately when the bike is parked.
Gearing and drivetrain: where conversions earn their keep
Because a mid-drive works through the chain, shifting technique matters. Ease off pedal pressure during gear changes. Shifting under full motor load can put a sharp strain on the chain and cassette, particularly on lower-quality or worn components.
A smaller chainring improves climbing and reduces stress when riding slowly uphill. A larger chainring raises cruising speed but can make steep starts harder on both rider and drivetrain. The right choice depends on your routes and wheel size. There is no benefit in building a conversion that races along flat roads but struggles on the hill outside your front door.
Before installation, inspect chain wear, cassette teeth, jockey wheels and chainring condition. Replacing a stretched chain after fitting the motor is not enough if it has already worn the cassette. This is also a sensible time to check wheel tension, tyres and bearings. Electric assistance exposes neglected maintenance quickly.
Some systems can be paired with gear sensors that briefly reduce motor output while you shift. They are particularly useful for riders who value smooth changes or use internal-gear hubs. Correct adjustment still matters; a sensor supports good technique, it does not replace it.
Installation is a safety job, not just a fitting job
A conversion kit may arrive with the key components, but a dependable build needs more than bolting a motor into place. Motor lockrings must be tightened correctly. Cables need routing away from tyres, cranks and sharp edges. Connectors need to be seated properly and protected from water ingress. Brake cut-offs, displays and speed sensors need testing before the bike goes on the road.
The battery cradle needs particular care. It must be fixed to strong mounting points with suitable hardware, and the wiring should have enough slack for steering without hanging loose. A rattling battery or rubbing cable is not a cosmetic issue. It can become a safety issue on rough roads.
Once fitted, the bike should be test-ridden under load. Check that the chainline is acceptable in the gears you use most, that the motor stops assisting when it should, and that the brakes feel confident at assisted speed. Recheck fasteners after the first few rides, when parts have settled in.
Professional installation is especially valuable if your bike has hydraulic brakes, internal cable routing, unusual bottom-bracket dimensions or a frame where battery space is tight. It also gives you a clear starting point for future servicing. The Bike Shack can help match a suitable mid-drive system to the bike and the riding you actually do, then install and tune it for dependable daily use.
Keep your converted bike performing properly
A mid-drive bike rewards routine care. Keep the chain clean and lubricated, check tyre pressures weekly and inspect brake pads more often than you would on an unassisted bike. A properly inflated tyre improves range as well as handling.
Charge the battery with its supplied compatible charger, store it in a dry place away from extreme temperatures and avoid leaving it completely flat for long periods. For winter storage, a partial charge is generally kinder to lithium-ion batteries than either full charge or full depletion.
Pay attention to changes in sound and feel. Clicking under load, hesitant shifting or a new vibration is a reason to investigate early, not after a chain breaks on the way home. A short service visit is usually cheaper than replacing a chain, cassette and chainring together.
The right conversion is not about fitting the most powerful motor available. It is about building a bike that starts every morning, climbs the routes you ride, stops safely and keeps you looking forward to the next journey.