
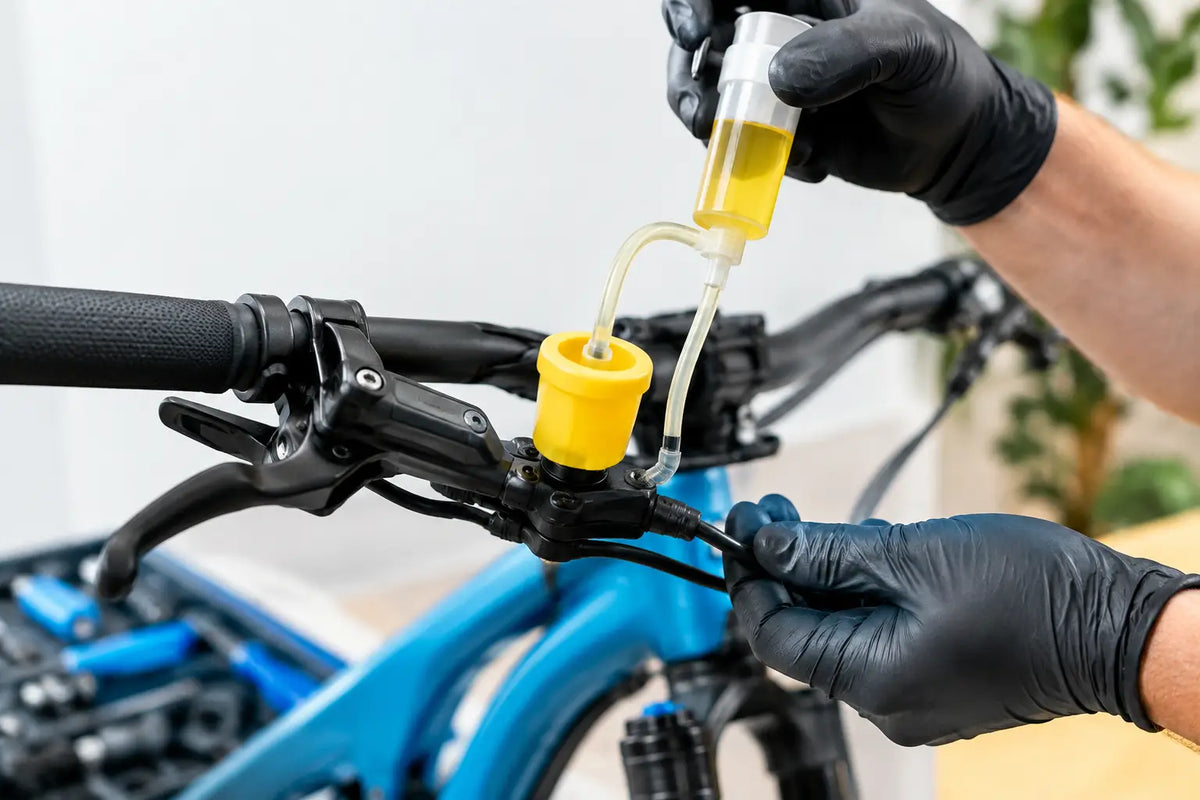
A brake lever that pulls back to the handlebar is not just annoying on a fast descent or busy commute. It is a warning that your stopping power needs attention. To bleed hydraulic bike brakes properly is to remove air from the system and refresh tired fluid, bringing back the firm, predictable lever feel that gives you confidence at every junction.
Hydraulic disc brakes are powerful because brake fluid transfers force with very little loss. Air does the opposite. It compresses, which creates a soft or spongy lever and can make braking feel inconsistent. The job is manageable for a capable home mechanic, but it is precise work. Using the wrong fluid, contaminating pads or missing a loose fitting can turn a simple service into a bigger repair.
When hydraulic brakes need bleeding
A soft lever is the obvious sign, but it is not the only one. If the lever feels firm at first and gradually sinks during a sustained pull, air or old fluid may be part of the problem. Brakes that have been stored upside down, transported with the front wheel high, or ridden hard on long descents can also benefit from inspection.
Fluid type matters. Shimano, Magura and many Tektro systems use mineral oil. SRAM hydraulic systems commonly use DOT brake fluid, although you should always confirm the specification printed on the lever or in the manufacturer documentation. These fluids are not interchangeable. Mineral oil in a DOT system, or DOT fluid in a mineral-oil system, can damage seals and require a full rebuild.
A bleed is not a cure for every braking issue. Worn pads, a glazed rotor, a leaking hose, a sticky piston or a loose caliper can all reduce performance. Check the simple mechanical causes first. If you can see fluid around a lever, hose connection or caliper, stop riding until the source is repaired.
What you need before you start
The correct bleed kit for your brake brand is essential. Fittings, syringes, funnels and bleed-port threads vary, so a universal kit can be a false economy if it does not seal properly. You will also need the exact approved fluid, clean nitrile gloves, lint-free cloths, isopropyl alcohol, a pad spacer or bleed block, and the correct hex or Torx keys.
Keep brake fluid away from rotors and pads. DOT fluid can harm paint and finishes, while mineral oil can permanently contaminate pads and cause noisy, weak braking. Cover the frame and work on one brake at a time. Good lighting and a stable bike stand make the job far easier.
Before opening the system, remove the wheel and take out the brake pads. Fit a bleed block between the pistons. This prevents them moving out while you operate the lever and keeps valuable pads clear of any accidental fluid splash. Do not squeeze the brake lever with pads removed unless the correct block is in place.
How to bleed hydraulic bike brakes
The exact sequence changes between brands, but the principle stays the same: replace old fluid and move trapped air towards the appropriate bleed port without introducing more bubbles.
1. Set the bike and lever position
Position the bike so the brake lever reservoir is level. On many systems, this means rotating the handlebar slightly in the stand. Air naturally rises, so a level reservoir gives bubbles a clear path out. Check the hose for sharp bends or high loops that can trap air.
For a rear brake, it can help to gently tap the hose from caliper to lever during the process. Do not strike it hard. Light tapping is enough to encourage stubborn bubbles to move.
2. Prepare clean fluid and fittings
Open your fresh fluid only when ready to use it. With syringe-based kits, fill the syringe slowly and remove its own air bubbles before connecting it to the caliper. Hold it upright, tap the barrel and push out air until only fluid reaches the hose.
With funnel-style systems, fit the funnel at the lever according to the manufacturer instructions and add a small amount of clean fluid. Avoid reusing fluid that has been pushed out of the system. Once exposed to dirt or moisture, it should be disposed of responsibly rather than poured back into the bottle.
3. Move fluid through the system steadily
Attach the caliper fitting securely, then open the bleed port only as far as specified. Push fresh fluid through slowly, or follow the prescribed pull-and-push sequence for your brake. Rushing creates turbulence and can break large bubbles into smaller ones that are harder to remove.
Watch for bubbles at the lever funnel or the second syringe. Continue until fluid is clean and bubble-free. Gently flicking the lever body, caliper and hose can release air clinging inside the system. Some brakes require the lever to be pulled and held at specific points in the procedure, so follow the instructions for your model rather than relying on a generic video.
4. Set the final lever feel
Once the fluid is clear and bubbles have stopped appearing, close the caliper port to the correct tightness before removing the syringe. Finish the lever end of the procedure, then replace bleed screws, seals or plugs carefully. Small O-rings and port seals need to sit cleanly and squarely to prevent slow leaks.
The lever should now feel positive, with a consistent bite point. It does not need to feel rock-hard - lever feel differs by brand and model - but it should not pull close to the bar under firm pressure.
5. Clean, rebuild and test
Clean every area around the caliper, hose fittings and lever with isopropyl alcohol. Refit the pads and wheel, then centre the caliper if the rotor rubs. Spin the wheel and apply the brake repeatedly before riding.
Start with a controlled test in a safe, flat area. Check that the wheel stops firmly, the lever remains consistent and no fluid appears around the fittings. If you fitted new pads or cleaned a contaminated rotor, bed the brakes in with repeated progressive stops before expecting full power.
Common mistakes that cost braking power
The most common mistake is treating all brake fluid as the same. It is not. Use only the fluid specified for the brake, stored in a clean, sealed container. DOT fluid absorbs moisture over time, which is why replacement intervals matter, while mineral oil systems still need clean, correct fluid and careful handling.
Another issue is leaving the pads in place. A single drop of fluid can soak into pad material. Sometimes a careful clean helps, but replacement is often the reliable answer. For the same reason, never spray lubricant near a rotor or caliper.
Overfilling can also cause trouble. If there is no room for fluid expansion, pistons may not retract correctly as pads wear or temperatures rise. Use the correct bleed block and follow the specified procedure rather than forcing extra fluid into the system.
Finally, do not ignore a lever that goes soft again soon after bleeding. That usually points to a leak, a damaged diaphragm, worn seals or a fitting that needs attention. Bleeding repeatedly without finding the cause wastes fluid and delays the real repair.
E-bike brakes deserve closer attention
Electric bikes are heavier and often travel at higher average speeds, particularly on commutes with cargo, hills or mixed traffic. That puts more heat and load through the braking system. A properly bled brake is only one part of reliable stopping power: pad compound, rotor size, caliper alignment and tyre grip all matter too.
If an e-bike conversion has changed the bike's weight or performance, consider whether the original brakes remain suitable. Larger rotors, four-piston calipers or better-quality pads may be a worthwhile safety upgrade, depending on the frame, fork and riding conditions. The Bike Shack can assess the full setup rather than simply chasing a firmer lever.
When to book a workshop bleed
A home bleed makes sense when you have the correct kit, a clean workspace and confidence following model-specific instructions. A workshop is the better option when fluid has leaked, pistons are sticking, brake parts are damaged, or you are unsure which fluid your system takes. It is also sensible if the bike is your daily transport and you cannot afford unreliable stopping power.
Brakes are one area where careful work pays back immediately. Give yourself time, keep fluid and friction surfaces separate, and test thoroughly before your next proper ride. A firm lever is satisfying, but dependable control is the real upgrade.